


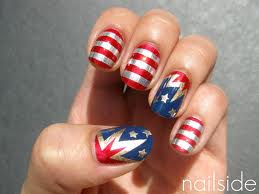
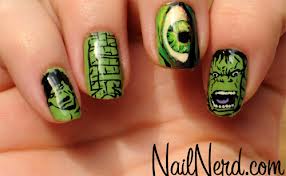
Various kinds of Nail art:-
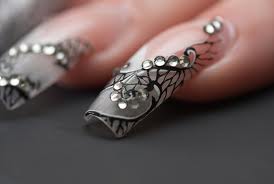
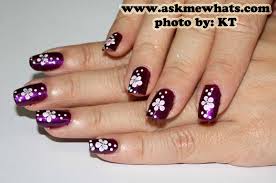
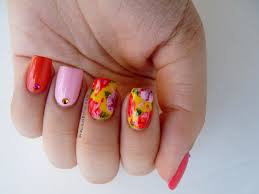
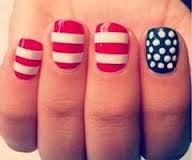
IMAGES FOR NAIL ART
 v
v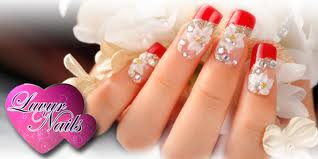
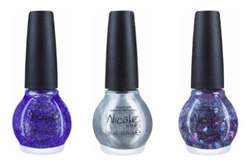
Justin Bieber for Nicole by OPIAs odd as it may seem, Justin Bieber has in fact collaborated on a nail polish collection that will debut in December at Wal-Mart stores nationwide.
According to Stylelist, the collection will include six shades that are chock-full of glitter and come with names like “One Less Lonely Glitter” and “Me + Blue.”
While this collaboration is obviously aimed at the tween set, if you’re a fan of fun nail polish shades, it may be worth checking out.
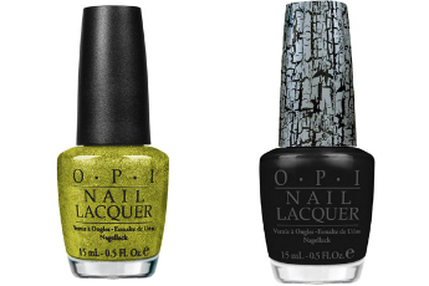
Serena Williams’ Grand Slam Collection for OPITennis champ Serena Williams will also be creating an exclusive sports-themed polish line for OPI. Stylelist is reporting that the collection will consist of four different mini-collections of two shades, each one corresponding with major tennis events.
The first duo, inspired by the Australian Open will be available in January and includes the metallic green “Simply Smashing” as well as the “Black Shatter” featured in Katy’s collection. The other three duos will run in conjunction with the French Open (May), Wimbledon (June) and the US Open (August).
When asked why she was creating a nail polish collection, Serena said:
American Apparel Sues the Forsythe Group over Exploding Nail Polish Bottles
American Apparel launched nail polish a couple of years ago? Turns out the launch wasn’t as hipster hunky-dory as the company had hoped. The nail polish, it seems, was “exploding” on store shelves. No, seriously. The company is now suing the nail-polish bottle-maker:
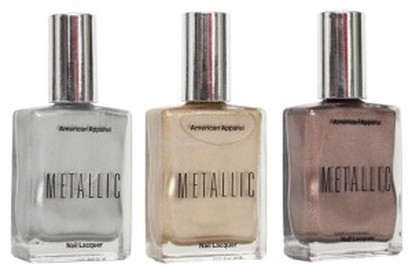
American Apparel Launches 3 Metallic Polishes
American Apparel have launched 3 metallic colours “just in time for the holidays”. They have a silver metallic cap to signify they are metallic polishes (instead of the normal black cap).
I only own 1 American Apparel polish, Mouse. I’ve just never gotten around to buying any others, I doubt I’ll be buying these…but they look like nice colours. Not original but nice. I don’t have much to say about this brand!!
HOW TO DO NAIL ART:-
1 Prepare Your Nails
2 Remove old polish. Make sure you're starting with a clean slate by removing any old polish that's still lingering on your nails.
Trim and file your nails. Shape your nails to make them uniform and neat. Since you're creating nail art, try not to trim them too short. It's better to have more space to work with.
Apply a base coat. Base coats are usually clear or bluish in color, and can be purchased wherever nail polish is sold. They protect your nails from getting stained or damaged by paint and other nail art materials.
Apply one layer of base coat and allow it to completely dry before proceeding.
Some base coats remain tacky after drying. This texture is meant to help the next layer, the polish, stay in place for longer without chipping. Choose whichever base coat you like best.
Beginner Designs
1 Paint just the tip of your nail a different color. Choose two complementary colors that will look gr eat on the same nail.
2 Apply a base coat color or a clear base coat. Allow the polish to dry.
3 Place a French manicure sticker across your nail, leaving the tip exposed. If you don't have a French manicure sticker, use a similarly-shaped sticker, such as the circular stickers that reinforces punched holes in paper.
4 Paint the tip color above the sticker. It's OK if you overlap the paint with the sticker a bit.
5 Remove the sticker while the paint is still wet, so you don't pull of chips of paint with it when you take it off.
6 Allow the design to dry completely and finish it off with clear top coat.
7 Add a jewel or sticker to your nail. Start with a coat of your favorite nail polish and accent it with a pretty decoration.
8 Apply a base coat color or a clear base coat. Allow the polish to dry.
9 Place a dab of nail glue or nail gel on your nail. Put it high on the nail, toward the tip, or in a lower corner. Think about where it will look best.
10 Pick up the jewel or sticker with a pair of tweezers and drop it onto the gel or glue. Use the tweezers to gently press it into place.
11 Allow the glue to dry.
12 Paint a clear top coat over the nail to keep the sticker or jewel from falling off.
13Go with a glitter effect. Try one of these techniques:
14 Mix loose glitter with nail gel or clear polish and apply it to your nails. When the application has dried, add a top coat.
15 Cover one or more of your nails with nail gel or polish. Dust the nails with glitter and allow them to dry before finishing off with a top coat.
Polka Dot Designs
1.Create simple dots. Choose two colors, a base coat and a dot color. If you'd like, you can use multiple colors for the dots.
2.Apply the base coat color. Allow it to dry completely.
3.Dip a small brush, toothpick or pin into the polish you chose for the dots and lightly tap the implement on your nail. Continue doing this until your nail has as many dots as you want.
4.You can create dots of varying sizes by using thinner or thicker-tipped implements.
5.To make fading or trailing dots, dip the implement in the paint once and apply several dots with it without reapplying paint.
6.You can also use your fine-tipped implement to drag the paint out from the wet dot to create rays, swirls and other designs.
7.When the dots are dry, finish with a clear top coat.
8 Make a floral design. An arrangement of dots can be made to look like a flower. Choose three colors: a base coat color, a color for the center of the flowers, and a color for the petals.
9 Apply the base coat color. Allow it to dry completely.
10 Use a thin-tipped brush or toothpick to place groups of five dots arranged in circles on your nails. These are the petals.
11 When the petal dots dry, use the their color to paint a simple circle in the center of the petal dots.
You can add extra detail by placing a tiny white stripe in the center of the petals, or creating leaves with green nail polish.
12 Take care not to crowd too many flowers on each nail. Make sure the flowers are distinct from one another.
13 When the flower designs are dry, finish with a clear top coat.
14 .Create a leopard print. For this look choose two colors: a light and a dark. Try fucsia or orange and black.
15 .Use the lighter color to make splotches on your nails. The shapes don't have to be uniform, just as leopard's spots aren't uniform.
16 .When the splotches dry, draw "C" or "U" shapes around the outsides of the blobs using the darker color.
17 .Add some dots or small swirls of the dark color between the outlined blobs.
18 .When the leopard spots are dry, finish with a clear top coat - or, for added flair, paint over the design with a clear glittery nail polish.
Blended Color Designs
1 Make a swirl. You'll need three different colors: a base coat plus two different colors that will look good swirled together on top of the base coat.
2 Apply the base coat color and allow it to dry.
3 Apply a clear top coat to seal in the base coat, and allow it to dry.
4 Apply a dot of the first swirl color using a toothpick.
5 Use a clean toothpick to apply a dot of the second swirl color on top of the first dot while the first dot is still wet.
6 Drag the colors outward together and create swirls using a clean toothpick, striper brush or other implement.
7 You can also create a marble effect by randomly placing several dots of the first swirl color on the nail, then placing several dots of the second swirl color around and on top of the first set of dots. Swirl the dots around and together by moving your implement in a criss-cross, S-shaped or figure-8 pattern.
8 Try gradient (ombre) nails. Ombre looks best with colors in the same color family, like purples and blues. For this look you'll need three colors: a dark color, a medium color, and a light one.
9 Apply a coat of the darkest color to your nails and allow it to dry.
10 Dip a makeup sponge into a dark colored polish (only a dab of polish is needed on the sponge) and apply the medium color to the tips of your nails, starting at the tip and moving down to create a fading effect.
11 With a clean makeup sponge, dab the lightest color onto your nails in the same fashion, starting from the tip and fading downward toward the base of your nails.
12 The resulting look should be bright-tipped nails that fade downward toward the darkest base coat col or.
13 Apply a clear top coat while the polishes are still wet to more completely smear the colors together.
14 Create a watercolor effect. In this case you'll need two or more colors: white, and another color or two of your choice.
15 Apply the white polish as the base coat.
16 Before the base coat dries, use a toothpick or other implement to place dots in another color or two on top of the base coat.
17 Dip a large brush in acetone and dab it onto the drops of polish. Use the acetone and the brush to thin and smear the dots over the white base coat. If you're successful, you'll have an impressionistic Monet-inspired design.
18 When the watercolor design is dry, apply a clear top coat.
19 Make acid-washed nails. To simulate the look of acid-washed jeans, use blue and white polishes.
Use the blue color for the base coat. Allow it to dry and apply a clear top coat.
20 When these coats have dried, paint a single layer of white polish over the base coat.
21 Dip a cotton swab in acetone and use it to lightly rub away and thin out the white polish. Stop when enough of the blue layer shows through to create an acid-washed look.
22 When the acid wash design has dried, finish with a clear top coat.
Water-Marbled Designs
Gather your supplies. Water marbling is a creative technique that uses water and a variety of colors for a unique look. Get the following materials ready:
A base coat and two or three colors that blend well together, like light blue, yellow and white.
A shallow, wide-mouthed cup or bowl filled almost to the brim with room-temperature water.
Petroleum jelly.
Apply the base coat color. Allow it to dry completely.
Add color to the water. Drop some polish into the water from a low height. Notice how it creates a circle of color within the water.
Drop an alternate color into the center of the first color. Continue adding drops in the same way, at the center of the circle of color, alternating the colors until you see a bullseye shape.
Use a toothpick to alter the design. Insert it in the water and drag it through the bullseye of color to create patterns.
Spiderweb designs are popular, as are flower designs and geometric shapes.
Don't go too far with the toothpick, since if you blend the colors too much they won't be distinct from one another.
If you create something with the toothpick and you don't like it, simply discard your first attempt and start over from the beginning.
Apply the design to your nails. Spread petroleum jelly on the skin around your nails and up your fingers. Carefully place your nails against the design that you created and then submerge them slightly.
Remove your nails from the water. Blow off any water droplets and use a cotton swab (coated with acetone if necessary) to clean up the edges and remove polish from your fingers.
Allow the design to dry completely. Finish with a clear top coat.
Nail Stamping Designs
Gather your supplies. Nail stamping is a technique that allows you to apply a detailed image to your nails. It requires special equipment that can be found at nail supply stores. Purchase the following items:
A nail stamper and plate scraper.
An image plate. Plates come with many images to choose from, so you don't always have to stamp the same image.
Special stamping polish. This polish is designed to hold the image well.
If you'd prefer not to purchase special stamping polish, you can use opaque polish that is not quick dry.
Apply a base coat color to your nails. Allow it to dry completely.
Choose an image from the image plate. Paint over the image with a coat of stamping or opaque nail polish
.
Scrape off the excess polish. Use the scraper tool to scrape off the extra polish so that you only see the design in the image plate. If you don't have a scraper, use an old plastic gift card or credit card.
Roll the stamper over the design. Then, lift the stamper and press the design onto your nail.
If the design is larger than your nail, then clean up the excess polish around your nail exterior with a cotton swab and acetone.
Continue stamping the design on as many nails as you'd like. You can always mix and match designs on different nails for an eclectic look.
Finding Inspiration
Take a class at your local nail salon. Just a few hours with a professional teacher can advance your skills more effectively than years of practicing on your own.
Read books on nail art. You may be able to find a book in your local library or bookstore, or you can purchase something online.
Search the Web. The Web provides multitudes of resources, especially if you’re just looking for new ideas. In addition to finding sites with photos of new designs, you can find forums in which people who love nail art talk about techniques and learning experiences.
Watch videos on sites such as YouTube
IMAGES FOR NAIL ART
vJustin Bieber for Nicole by OPIAs odd as it may seem, Justin Bieber has in fact collaborated on a nail polish collection that will debut in December at Wal-Mart stores nationwide.
According to Stylelist, the collection will include six shades that are chock-full of glitter and come with names like “One Less Lonely Glitter” and “Me + Blue.”
While this collaboration is obviously aimed at the tween set, if you’re a fan of fun nail polish shades, it may be worth checking out.
Serena Williams’ Grand Slam Collection for OPITennis champ Serena Williams will also be creating an exclusive sports-themed polish line for OPI. Stylelist is reporting that the collection will consist of four different mini-collections of two shades, each one corresponding with major tennis events.
The first duo, inspired by the Australian Open will be available in January and includes the metallic green “Simply Smashing” as well as the “Black Shatter” featured in Katy’s collection. The other three duos will run in conjunction with the French Open (May), Wimbledon (June) and the US Open (August).
When asked why she was creating a nail polish collection, Serena said:
American Apparel Sues the Forsythe Group over Exploding Nail Polish Bottles
American Apparel launched nail polish a couple of years ago? Turns out the launch wasn’t as hipster hunky-dory as the company had hoped. The nail polish, it seems, was “exploding” on store shelves. No, seriously. The company is now suing the nail-polish bottle-maker:
American Apparel Launches 3 Metallic Polishes
American Apparel have launched 3 metallic colours “just in time for the holidays”. They have a silver metallic cap to signify they are metallic polishes (instead of the normal black cap).
I only own 1 American Apparel polish, Mouse. I’ve just never gotten around to buying any others, I doubt I’ll be buying these…but they look like nice colours. Not original but nice. I don’t have much to say about this brand!!
HOW TO DO NAIL ART:-
1 Prepare Your Nails
2 Remove old polish. Make sure you're starting with a clean slate by removing any old polish that's still lingering on your nails.
Trim and file your nails. Shape your nails to make them uniform and neat. Since you're creating nail art, try not to trim them too short. It's better to have more space to work with.
Apply a base coat. Base coats are usually clear or bluish in color, and can be purchased wherever nail polish is sold. They protect your nails from getting stained or damaged by paint and other nail art materials.
Apply one layer of base coat and allow it to completely dry before proceeding.
Some base coats remain tacky after drying. This texture is meant to help the next layer, the polish, stay in place for longer without chipping. Choose whichever base coat you like best.
Beginner Designs
1 Paint just the tip of your nail a different color. Choose two complementary colors that will look gr eat on the same nail.
2 Apply a base coat color or a clear base coat. Allow the polish to dry.
3 Place a French manicure sticker across your nail, leaving the tip exposed. If you don't have a French manicure sticker, use a similarly-shaped sticker, such as the circular stickers that reinforces punched holes in paper.
4 Paint the tip color above the sticker. It's OK if you overlap the paint with the sticker a bit.
5 Remove the sticker while the paint is still wet, so you don't pull of chips of paint with it when you take it off.
6 Allow the design to dry completely and finish it off with clear top coat.
7 Add a jewel or sticker to your nail. Start with a coat of your favorite nail polish and accent it with a pretty decoration.
8 Apply a base coat color or a clear base coat. Allow the polish to dry.
9 Place a dab of nail glue or nail gel on your nail. Put it high on the nail, toward the tip, or in a lower corner. Think about where it will look best.
10 Pick up the jewel or sticker with a pair of tweezers and drop it onto the gel or glue. Use the tweezers to gently press it into place.
11 Allow the glue to dry.
12 Paint a clear top coat over the nail to keep the sticker or jewel from falling off.
13Go with a glitter effect. Try one of these techniques:
14 Mix loose glitter with nail gel or clear polish and apply it to your nails. When the application has dried, add a top coat.
15 Cover one or more of your nails with nail gel or polish. Dust the nails with glitter and allow them to dry before finishing off with a top coat.
Polka Dot Designs
1.Create simple dots. Choose two colors, a base coat and a dot color. If you'd like, you can use multiple colors for the dots.
2.Apply the base coat color. Allow it to dry completely.
3.Dip a small brush, toothpick or pin into the polish you chose for the dots and lightly tap the implement on your nail. Continue doing this until your nail has as many dots as you want.
4.You can create dots of varying sizes by using thinner or thicker-tipped implements.
5.To make fading or trailing dots, dip the implement in the paint once and apply several dots with it without reapplying paint.
6.You can also use your fine-tipped implement to drag the paint out from the wet dot to create rays, swirls and other designs.
7.When the dots are dry, finish with a clear top coat.
8 Make a floral design. An arrangement of dots can be made to look like a flower. Choose three colors: a base coat color, a color for the center of the flowers, and a color for the petals.
9 Apply the base coat color. Allow it to dry completely.
10 Use a thin-tipped brush or toothpick to place groups of five dots arranged in circles on your nails. These are the petals.
11 When the petal dots dry, use the their color to paint a simple circle in the center of the petal dots.
You can add extra detail by placing a tiny white stripe in the center of the petals, or creating leaves with green nail polish.
12 Take care not to crowd too many flowers on each nail. Make sure the flowers are distinct from one another.
13 When the flower designs are dry, finish with a clear top coat.
14 .Create a leopard print. For this look choose two colors: a light and a dark. Try fucsia or orange and black.
15 .Use the lighter color to make splotches on your nails. The shapes don't have to be uniform, just as leopard's spots aren't uniform.
16 .When the splotches dry, draw "C" or "U" shapes around the outsides of the blobs using the darker color.
17 .Add some dots or small swirls of the dark color between the outlined blobs.
18 .When the leopard spots are dry, finish with a clear top coat - or, for added flair, paint over the design with a clear glittery nail polish.
Blended Color Designs
1 Make a swirl. You'll need three different colors: a base coat plus two different colors that will look good swirled together on top of the base coat.
2 Apply the base coat color and allow it to dry.
3 Apply a clear top coat to seal in the base coat, and allow it to dry.
4 Apply a dot of the first swirl color using a toothpick.
5 Use a clean toothpick to apply a dot of the second swirl color on top of the first dot while the first dot is still wet.
6 Drag the colors outward together and create swirls using a clean toothpick, striper brush or other implement.
7 You can also create a marble effect by randomly placing several dots of the first swirl color on the nail, then placing several dots of the second swirl color around and on top of the first set of dots. Swirl the dots around and together by moving your implement in a criss-cross, S-shaped or figure-8 pattern.
8 Try gradient (ombre) nails. Ombre looks best with colors in the same color family, like purples and blues. For this look you'll need three colors: a dark color, a medium color, and a light one.
9 Apply a coat of the darkest color to your nails and allow it to dry.
10 Dip a makeup sponge into a dark colored polish (only a dab of polish is needed on the sponge) and apply the medium color to the tips of your nails, starting at the tip and moving down to create a fading effect.
11 With a clean makeup sponge, dab the lightest color onto your nails in the same fashion, starting from the tip and fading downward toward the base of your nails.
12 The resulting look should be bright-tipped nails that fade downward toward the darkest base coat col or.
13 Apply a clear top coat while the polishes are still wet to more completely smear the colors together.
14 Create a watercolor effect. In this case you'll need two or more colors: white, and another color or two of your choice.
15 Apply the white polish as the base coat.
16 Before the base coat dries, use a toothpick or other implement to place dots in another color or two on top of the base coat.
17 Dip a large brush in acetone and dab it onto the drops of polish. Use the acetone and the brush to thin and smear the dots over the white base coat. If you're successful, you'll have an impressionistic Monet-inspired design.
18 When the watercolor design is dry, apply a clear top coat.
19 Make acid-washed nails. To simulate the look of acid-washed jeans, use blue and white polishes.
Use the blue color for the base coat. Allow it to dry and apply a clear top coat.
20 When these coats have dried, paint a single layer of white polish over the base coat.
21 Dip a cotton swab in acetone and use it to lightly rub away and thin out the white polish. Stop when enough of the blue layer shows through to create an acid-washed look.
22 When the acid wash design has dried, finish with a clear top coat.
Water-Marbled Designs
Gather your supplies. Water marbling is a creative technique that uses water and a variety of colors for a unique look. Get the following materials ready:
A base coat and two or three colors that blend well together, like light blue, yellow and white.
A shallow, wide-mouthed cup or bowl filled almost to the brim with room-temperature water.
Petroleum jelly.
Apply the base coat color. Allow it to dry completely.
Add color to the water. Drop some polish into the water from a low height. Notice how it creates a circle of color within the water.
Drop an alternate color into the center of the first color. Continue adding drops in the same way, at the center of the circle of color, alternating the colors until you see a bullseye shape.
Use a toothpick to alter the design. Insert it in the water and drag it through the bullseye of color to create patterns.
Spiderweb designs are popular, as are flower designs and geometric shapes.
Don't go too far with the toothpick, since if you blend the colors too much they won't be distinct from one another.
If you create something with the toothpick and you don't like it, simply discard your first attempt and start over from the beginning.
Apply the design to your nails. Spread petroleum jelly on the skin around your nails and up your fingers. Carefully place your nails against the design that you created and then submerge them slightly.
Remove your nails from the water. Blow off any water droplets and use a cotton swab (coated with acetone if necessary) to clean up the edges and remove polish from your fingers.
Allow the design to dry completely. Finish with a clear top coat.
Nail Stamping Designs
Gather your supplies. Nail stamping is a technique that allows you to apply a detailed image to your nails. It requires special equipment that can be found at nail supply stores. Purchase the following items:
A nail stamper and plate scraper.
An image plate. Plates come with many images to choose from, so you don't always have to stamp the same image.
Special stamping polish. This polish is designed to hold the image well.
If you'd prefer not to purchase special stamping polish, you can use opaque polish that is not quick dry.
Apply a base coat color to your nails. Allow it to dry completely.
Choose an image from the image plate. Paint over the image with a coat of stamping or opaque nail polish
.
Scrape off the excess polish. Use the scraper tool to scrape off the extra polish so that you only see the design in the image plate. If you don't have a scraper, use an old plastic gift card or credit card.
Roll the stamper over the design. Then, lift the stamper and press the design onto your nail.
If the design is larger than your nail, then clean up the excess polish around your nail exterior with a cotton swab and acetone.
Continue stamping the design on as many nails as you'd like. You can always mix and match designs on different nails for an eclectic look.
Finding Inspiration
Take a class at your local nail salon. Just a few hours with a professional teacher can advance your skills more effectively than years of practicing on your own.
Read books on nail art. You may be able to find a book in your local library or bookstore, or you can purchase something online.
Search the Web. The Web provides multitudes of resources, especially if you’re just looking for new ideas. In addition to finding sites with photos of new designs, you can find forums in which people who love nail art talk about techniques and learning experiences.
Watch videos on sites such as YouTube